Construction Techniques & Processes
Diy star wars costume – Building a truly impressive Star Wars costume requires more than just a trip to the costume shop. It’s about mastering techniques that transform ordinary materials into iconic pieces of galactic history. Let’s delve into the practical side of crafting your own Star Wars masterpiece.
Realistic Blaster Prop Construction
Creating a convincing blaster involves careful planning and execution. PVC pipes are an excellent starting point for the blaster’s body. Different diameters can be used to create sections, joined securely with PVC cement. For added detail, consider wrapping the pipe with layers of carefully sculpted polymer clay, allowing for intricate greebles (small, added details that enhance realism).
Once dry, these additions can be painted and weathered to mimic the worn look of a well-used blaster. For the trigger and other small parts, consider using wood, metal scraps, or even 3D-printed components. Remember to always prioritize safety; ensure that your prop blaster is clearly identifiable as a non-functional replica, perhaps by including a bright orange tip.
Sewing Intricate Details: Jedi Robes and Sith Cloaks
The flowing robes of Jedi and the imposing cloaks of Sith are instantly recognizable. Creating these requires patience and skill with a sewing machine. Begin by selecting a suitable fabric; heavy cotton or linen works well for Jedi robes, while a heavier, darker fabric like wool or a polyester blend is suitable for Sith cloaks. Accurate patterns are crucial.
Numerous online resources and patterns are available to help you create a well-fitting garment. Pay close attention to details like stitching, seams, and embellishments. For Jedi robes, consider adding simple, elegant details like subtle embroidery or painted accents. Sith cloaks often feature more imposing elements, such as heavier stitching, dark lining, or even the addition of faux fur trim for a more dramatic look.
Applying Weathering Effects
To achieve a truly authentic look, your costume needs weathering. This isn’t about making it look dirty, but about suggesting a history of use and wear. Start by applying a base coat of paint appropriate to your chosen character and costume. Then, use various techniques to create the weathered effect. Dry brushing with a lighter shade can highlight raised areas and create a sense of wear.
Stippling with darker colors can add shadows and depth. For more dramatic effects, consider using washes or even carefully applied chipping techniques to suggest battle damage. Experiment with different paint techniques and levels of weathering to find the perfect balance for your character.
The ingenuity of crafting a DIY Star Wars costume, whether a meticulously detailed Darth Vader or a whimsical Ewok, speaks to a broader creative impulse. This same spirit of inventive resourcefulness fuels other pop culture costuming endeavors, such as the vibrant and chaotic aesthetic of a diy harley quinn costume , demanding both attention to detail and a playful disregard for convention.
Ultimately, both projects highlight the power of personal expression through handcrafted artistry, transforming readily available materials into iconic representations.
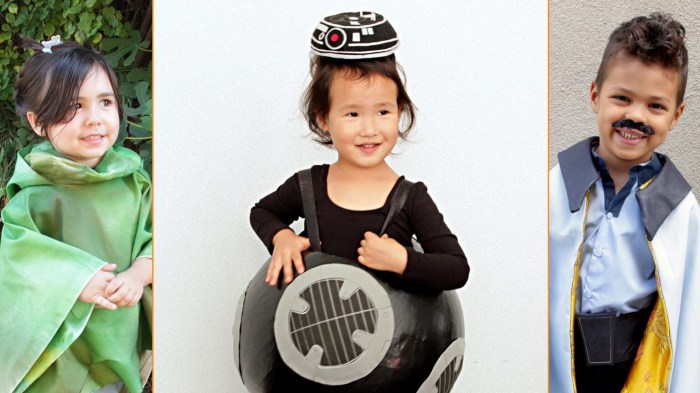
Constructing a Wearable BB-8 Droid Costume, Diy star wars costume
Creating a wearable BB-8 droid costume requires a multi-stage approach. This involves crafting the spherical body and the head separately and then connecting them to create a functional costume. The following table Artikels the construction process:
| Step | Description | Materials |
|---|---|---|
| 1. Body Construction | Create a large, lightweight sphere using foam board or a similar material. Cut and assemble sections to form the sphere, ensuring smooth transitions between panels. | Foam board, hot glue, paint, primer |
| 2. Head Construction | Construct a smaller, dome-shaped head using the same materials as the body. Ensure it’s securely attached to the body with a hinge mechanism for movement. | Foam board, hot glue, hinges, paint, primer |
| 3. Painting and Detailing | Apply a primer coat, then paint the sphere and dome in the signature BB-8 orange and white colors. Add additional details like decals or markings to increase realism. | Primer, orange and white paint, decals (optional) |
| 4. Internal Structure | Create a comfortable internal structure to wear the costume. This might involve a harness system or a lightweight frame to support the weight of the sphere. | Lightweight frame, comfortable straps, padding |
| 5. Final Assembly | Securely attach the head to the body, ensuring smooth movement. Test the costume to ensure comfort and mobility. | Hot glue, additional straps (if needed) |
Accessories & Finishing Touches: Diy Star Wars Costume

Transforming your DIY Star Wars costume from a good effort into a truly memorable creation hinges on the meticulous attention paid to the accessories and finishing touches. These details elevate the overall impact, lending an air of authenticity and captivating viewers with their craftsmanship. A well-chosen lightsaber, meticulously crafted accessories, and expertly applied weathering effects are the keys to unlocking a truly immersive and believable costume.
Lightsaber Hilt Designs
Three unique lightsaber hilt designs can significantly enhance your Star Wars costume. Consider these variations to reflect different characters or personal styles.
- The Jedi Master’s Elegance: This hilt, inspired by classic Jedi designs, features a polished, dark-stained hardwood core (perhaps cherry or ebony) wrapped in meticulously braided leather cord. Small, intricately carved brass accents, representing ancient runes or symbols, are inlaid along the grip. The pommel is a simple, slightly flared brass piece, while the emitter is crafted from a blackened metal tube, polished to a subtle sheen.
The construction involves careful woodworking, leatherworking, and metalworking skills, requiring precise measurements and careful assembly.
- The Sith Lord’s Brutality: This hilt exudes power and menace. Crafted from a rough-hewn piece of dark grey resin, it features sharp angles and textured surfaces. Metallic studs, possibly made from aluminum or steel, are embedded into the resin, adding a sense of brutal functionality. The pommel is a heavy, angular piece of dark metal, while the emitter is a menacingly sharp, slightly flared metal piece.
The construction involves mold-making (for the resin), careful embedding of the metal studs, and potentially some sanding and polishing to refine the overall look.
- The Mandalorian’s Practicality: This hilt reflects the rugged, functional aesthetic of Mandalorian weaponry. Constructed from weathered, dark grey metal tubing (perhaps PVC pipe, carefully painted and distressed), it features a simple, utilitarian design. Leather straps and buckles are used to secure the grip, and the pommel is a simple, capped end of the metal tubing. The emitter is a slightly flared metal piece, possibly with a simple, functional design.
The construction emphasizes weathering techniques and the use of readily available materials to achieve a believable, worn look.
Creating a Realistic-Looking Lightsaber
Achieving a realistic lightsaber effect requires careful attention to detail. The core element is a properly illuminated tube. A readily available solution involves using a sturdy PVC pipe as the hilt and embedding a long, thin LED strip inside. The LED strip can be powered by a small, easily concealable battery pack. The blade itself can be created using a translucent acrylic rod or tube, back-lit by the LED strip.
The acrylic should be carefully cut to the desired length, and the edges smoothed and polished to prevent injury. The connection between the hilt and the blade can be concealed with clever masking and paint application. Careful consideration of the LED’s color and brightness is crucial to achieving the desired lightsaber effect. For added realism, consider adding a subtle, flickering effect to the LED strip using a suitable circuit.
Unique Accessory Ideas
Five unique accessory ideas can enhance your Star Wars costume’s impact:
- Custom-made blaster: A well-crafted blaster, constructed from wood, plastic, or even repurposed materials, adds a touch of authenticity.
- Detailed utility belt: A belt featuring pouches, holsters, and other functional elements, adds realism and depth to your character.
- Character-specific communicator: A small, custom-made device resembling a communicator, enhances your costume’s story-telling potential.
- Beskar-inspired armor plating: Small pieces of carefully crafted and weathered metal plating, reminiscent of Mandalorian armor, add a touch of unique characterization.
- Custom-designed cape or cloak: A cape or cloak, tailored to your character and featuring unique detailing, elevates the overall appearance.
Applying Paint and Weathering Effects
Achieving a realistic look requires mastering paint application and weathering techniques. Begin with a base coat of appropriate color, ensuring even coverage. Then, use dry brushing techniques to apply lighter shades along raised edges and surfaces, highlighting texture and wear. For weathering, use various shades of brown, grey, and black to simulate dirt, grime, and scratches. Consider using washes (thinned paints) to add depth and shadows to crevices and recesses.
A final coat of matte sealant will protect the paint job and enhance its longevity. Remember, less is often more when it comes to weathering – subtle effects are generally more believable than overly dramatic ones. Referencing reference images of real-world objects or existing Star Wars props can guide your approach.
Costume Photography & Presentation

Bringing your DIY Star Wars costume to life extends beyond the construction process. Capturing its essence through compelling photography is crucial to showcasing your hard work and creativity. The right pose, backdrop, and lighting can transform a simple photograph into a memorable piece of Star Wars fan art.
Creative Poses and Backdrops
Strategic posing and backdrop selection are key to creating dynamic and engaging images. Consider the character you’re portraying; a Jedi Master will have a different posture than a stormtrooper. The backdrop should complement the character and evoke the Star Wars universe.
- Pose 1: The Forceful Stance. Imagine a Jedi Knight, lightsaber ignited, poised in a defensive stance against an unseen foe. The character’s body is slightly angled, one leg slightly forward, eyes focused on a point beyond the camera, conveying a sense of power and readiness. The lightsaber’s glow should be prominent.
- Pose 2: The Rebellious Sneak. A rebel soldier could be depicted crouched behind a partially destroyed vehicle, peering cautiously around a corner. The pose should communicate tension and alertness. The background should reinforce the sense of a battle-scarred landscape.
- Pose 3: The Imperial Inspection. A stormtrooper standing tall and rigid, hand resting on their blaster, in front of a massive Imperial star destroyer (represented in the backdrop). This pose emphasizes the character’s role within the Galactic Empire. The image should project an air of authority and control.
Sample Social Media Caption
“Years in the making, finally unveiled! My DIY Star Wars [Character Name] costume is complete! Huge thanks to [mention anyone who helped] for their support. May the Force be with you! #StarWars #DIYCostume #[CharacterName] #MayTheFourthBeWithYou #Cosplay”
Lighting and Photography Techniques
Proper lighting is paramount for showcasing the details of your costume. Harsh, direct sunlight can wash out colors and create unflattering shadows. Soft, diffused lighting, either natural or artificial, is ideal. Using a reflector to bounce light back onto the subject can fill in shadows and enhance details. Consider using a shallow depth of field to blur the background and draw attention to the costume.
Experiment with different angles and perspectives to find the most flattering shots.
Star Wars Costume Photography Backdrops
The backdrop significantly influences the overall mood and feel of your photographs. Consider these three options for creating immersive Star Wars-themed backdrops:
- Backdrop 1: The Wasteland. A desolate landscape, featuring rough textures, scattered debris, and a muted color palette. This could be achieved using textured fabrics, strategically placed props, and careful lighting to create a sense of barrenness and isolation.
- Backdrop 2: The Forest Moon. A lush, dimly lit forest, with tall trees, dappled light filtering through the leaves, and perhaps a misty atmosphere. This can be created using artificial foliage, strategically placed lighting, and possibly a fog machine for added effect. The overall mood should be mysterious and serene.
- Backdrop 3: The Imperial Hangar. A large, metallic space, with imposing structures, industrial elements, and a sense of scale. This could be achieved using grey and metallic fabrics, strategically placed props mimicking machinery, and lighting to create deep shadows and highlights.
Essential Questionnaire
What is the best time of year to start a DIY Star Wars costume project?
The ideal time to begin depends on the complexity of the costume. For intricate projects, starting several months in advance is recommended to allow ample time for planning, material sourcing, and construction. Simpler costumes can be undertaken with less lead time.
How much should I budget for a DIY Star Wars costume?
Costs vary greatly depending on the chosen character and the materials used. Repurposing items can significantly reduce expenses, while using high-quality materials for intricate details will increase costs. A realistic budget should consider materials, tools, and potential unforeseen expenses.
Where can I find patterns or templates for Star Wars costumes?
Online resources such as online forums, cosplay communities, and pattern websites offer a wealth of information and sometimes downloadable templates. However, many costumes require custom pattern creation based on reference images and personal measurements.
What safety precautions should I take when working with certain materials (e.g., foam, paint)?
Always follow the manufacturer’s instructions for all materials and tools. When working with foam, use appropriate safety glasses and a well-ventilated area. Wear a respirator mask when working with paints and adhesives to avoid inhaling harmful fumes.

